Blank cells in Excel – how to organize them better way?
Posted: Mon Jan 30, 2017 10:25 am
If you have lot of blank cells in your Excel data, there are several ways you can organize them nicely.
First one: Fill the blank cells with 0
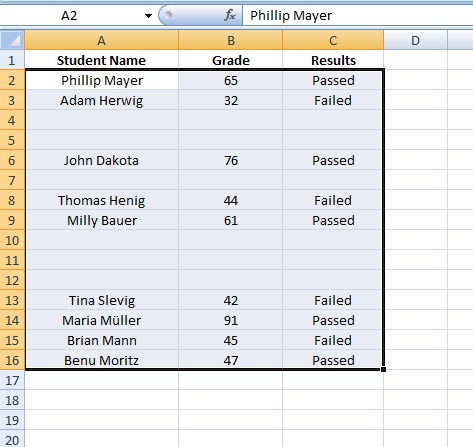
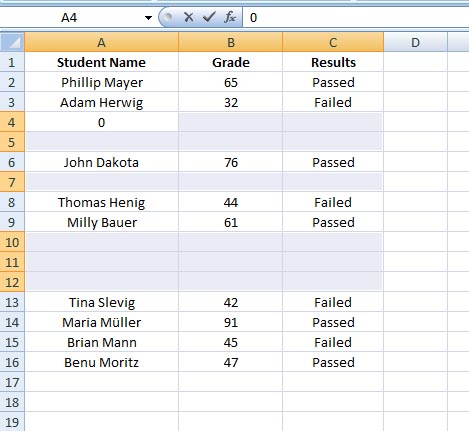
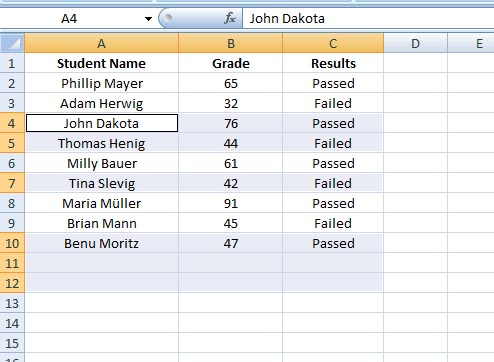
Select your data range (A2:C16)
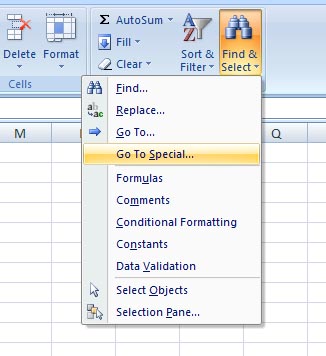
Go to Editing (under Home tab) > click on Find & Select > click on Go to Special...
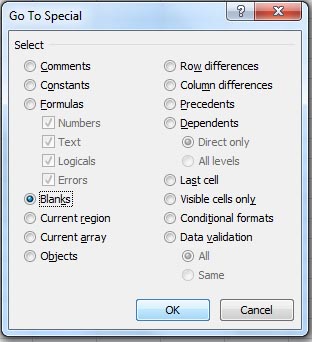
'Go To Special' Dialogue box opens > select Blanks > click OK.
All blank cells in your data range are now selected.
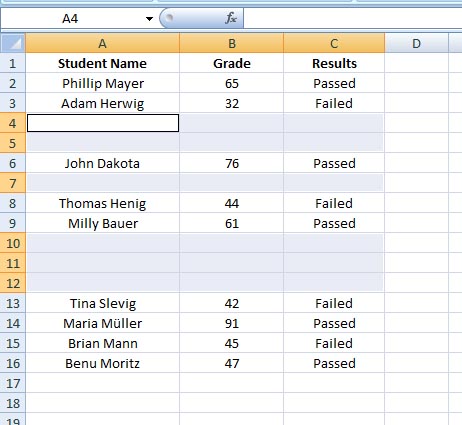
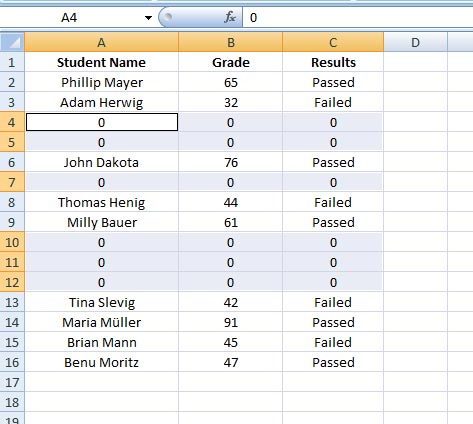
Just type a 0 (zero) - you will notice that the active cell, in this case A4, is immediately filled with a 0.
Now press Control + Enter. All your blank cells are now filled with 0.
Second one: Delete the blank cells
Do like before:
Select your data range (A2:C16)
Go to Editing (under Home tab) > click on Find & Select > click on Go to Special...
'Go To Special' Dialogue box opens > select Blanks > click OK.
All blank cells in your data range are now selected (like before).
Now right mouse click on any of the blank cells > choose Delete
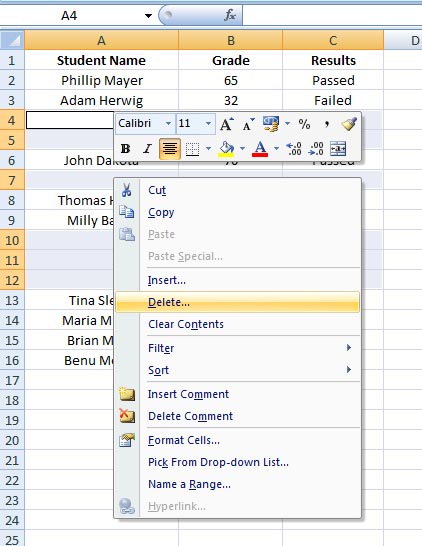
The small 'Delete' window opens. Now you have to select any of the four options, and it depends on how your data is distributed on the spreadsheet. In this case, I will select Entire row (may be in your case, you will need to select Shift cells left or Shift cells up) > click OK.
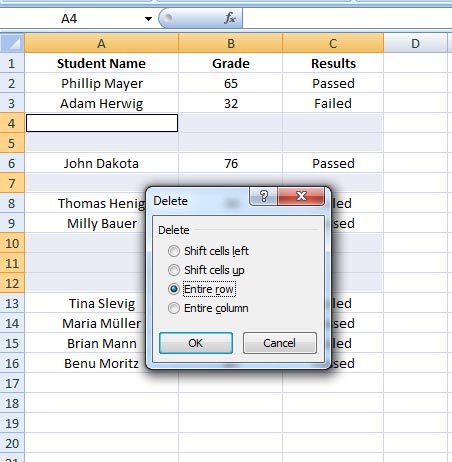
So my result is as follows
Don't worry about the light blue shade you still see in the above image, just clik anywhere on your spreadsheet, it will disappear immediately
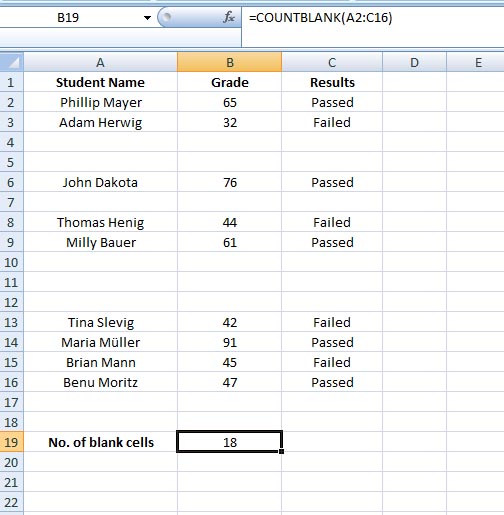
Number of blank cells:
If for any reason, you need to count the number of blank cells in your data range, then you can use the COUNTBLANK function – it counts the empty cells or blank cells in a specified range.
It's Syntax is the simplest:
COUNTBLANK(range)
So, enter in cell B19 =COUNTBLANK(A2:C16)
As you see, here in the example, I have 18 blank or empty cells.
Good work ahead
First one: Fill the blank cells with 0
Select your data range (A2:C16)
Go to Editing (under Home tab) > click on Find & Select > click on Go to Special...
'Go To Special' Dialogue box opens > select Blanks > click OK.
All blank cells in your data range are now selected.
Just type a 0 (zero) - you will notice that the active cell, in this case A4, is immediately filled with a 0.
Now press Control + Enter. All your blank cells are now filled with 0.
Second one: Delete the blank cells
Do like before:
Select your data range (A2:C16)
Go to Editing (under Home tab) > click on Find & Select > click on Go to Special...
'Go To Special' Dialogue box opens > select Blanks > click OK.
All blank cells in your data range are now selected (like before).
Now right mouse click on any of the blank cells > choose Delete
The small 'Delete' window opens. Now you have to select any of the four options, and it depends on how your data is distributed on the spreadsheet. In this case, I will select Entire row (may be in your case, you will need to select Shift cells left or Shift cells up) > click OK.
So my result is as follows
Don't worry about the light blue shade you still see in the above image, just clik anywhere on your spreadsheet, it will disappear immediately
Number of blank cells:
If for any reason, you need to count the number of blank cells in your data range, then you can use the COUNTBLANK function – it counts the empty cells or blank cells in a specified range.
It's Syntax is the simplest:
COUNTBLANK(range)
So, enter in cell B19 =COUNTBLANK(A2:C16)
As you see, here in the example, I have 18 blank or empty cells.
Good work ahead